

What problem are you solving?
Start with the problem, the place, the stage of building or the type of project. Every step and product comes from the manufacturer data sheets.
- 72 step-by-step solutions
- 22 project types
- 12 building stages
Solutions by location
Pick where the work is. Each solution gives the steps in working order, the product for each step with its data-sheet facts, and a proposal brief.
Waterproofing
Keep water out of roofs, terraces, walls and below-ground structures, with step-by-step systems for new build and repair taken from the Sika data sheets.
12 solutions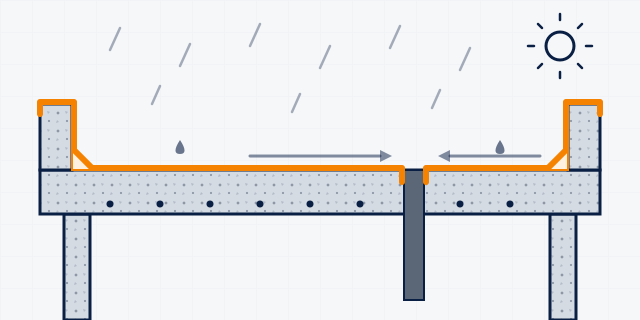 Exposed roof waterproofing
A liquid-applied membrane that stays open to sun and rain on a flat or sloped concrete roof (chhat). Use it on a new roof once the slab is 28 days old, or to refurbish a leaking roof before the monsoon.
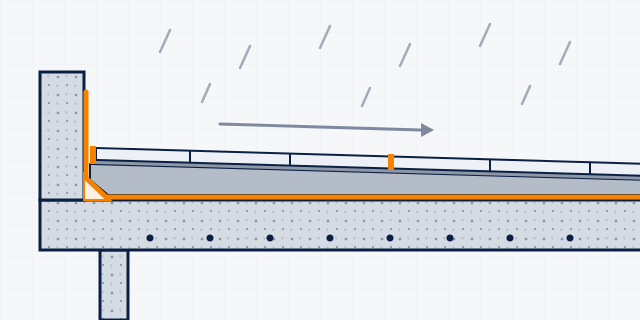 Roof waterproofing under screed or tiles
Waterproofing that is hidden under a protective screed, brick tiles or floor tiles on a flat roof. Use it when you re-do a traditional roof finish or turn the roof into a usable terrace.
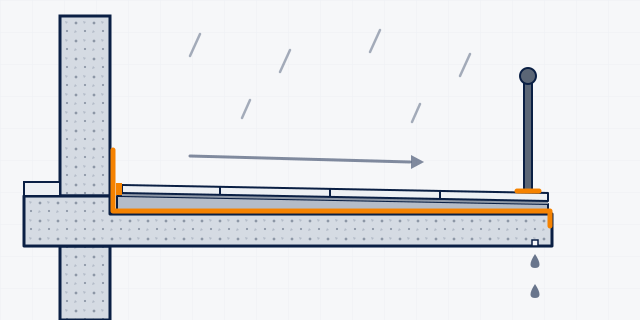 Terrace and balcony waterproofing
Balconies, terraces and open verandas that people walk on, usually finished with tiles. The waterproofing goes under the tile bed and turns up at walls, door thresholds and drains.
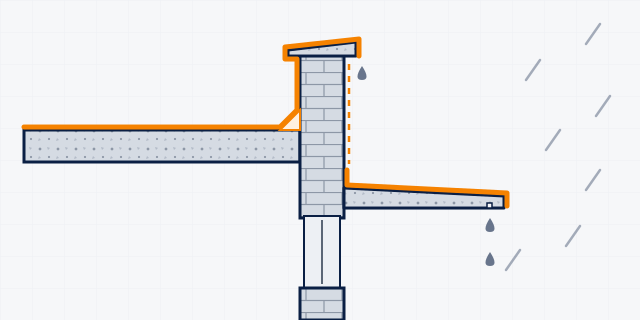 Parapets, copings and chajjas
Parapet walls, copings and chajjas (concrete sunshades and projections) take rain on three sides. Leaks here show up as damp on the walls below, broken edges and rust stains.
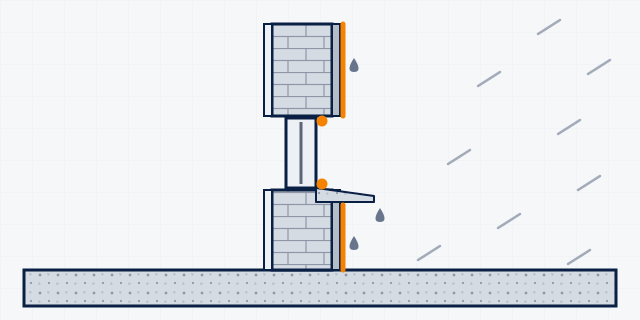 Damp external walls (rain penetration)
Rain soaking through brick walls, cracked plaster or open joints around windows causes seelan and peeling paint inside. This guide covers walls above ground. For damp rising from the floor, see the rising-damp guide.
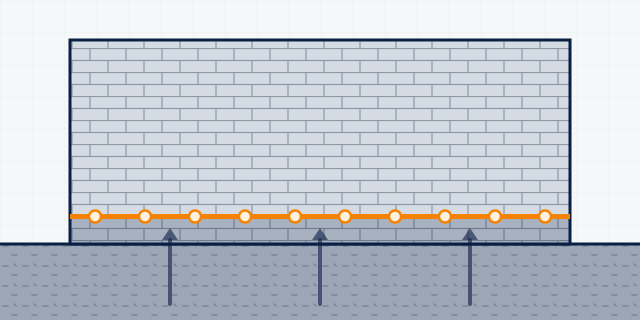 Rising damp in walls
Ground moisture rising up masonry walls that have no damp-proof course, or a failed one, causes seelan, salts and peeling paint near the floor. The fix is a new chemical damp-proof course injected into a mortar joint, followed by re-plastering.
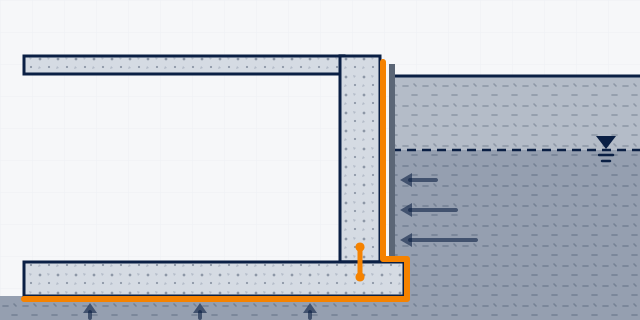 Basement waterproofing from outside (positive side)
For new basements, or where the soil can be dug away, stop water on the face that the soil and groundwater press against. Build watertight concrete, seal every joint, coat or sheet the outside face, then backfill carefully.
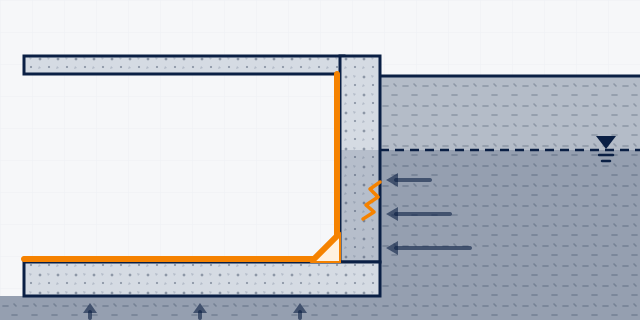 Basement waterproofing from inside (negative side)
In an existing basement where the outside cannot be dug out, water is stopped on the inside face. Plug active leaks, inject leaking cracks, then apply a cement-based coating that works against water pressure from behind.
 Retaining walls
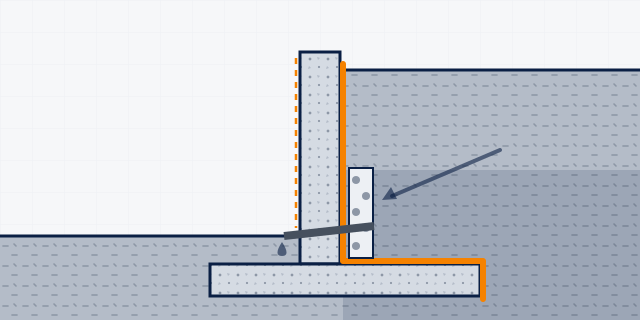
Walls that hold back soil and water, such as boundary walls on slopes, ramps, and the walls of basements and underpasses. Waterproof the soil face, seal the joints, and treat the exposed face and any leaks.
 Foundations, footings and plinth
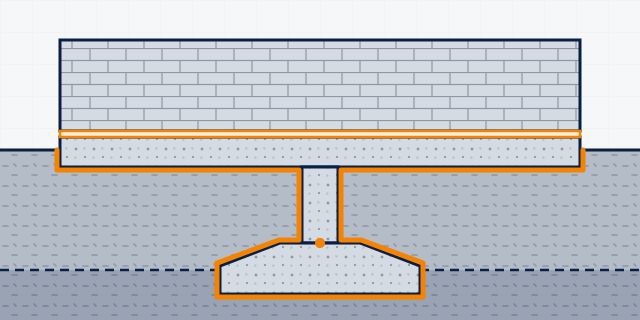
Protect footings, column stubs and plinth beams against groundwater and aggressive soil, and stop damp rising into the walls above. This is done during construction, before backfilling.
 Lift pits and drainage sumps
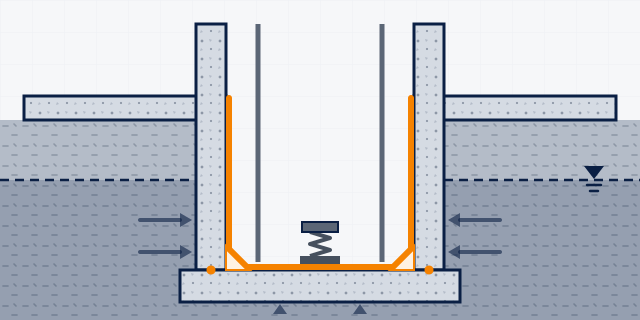
Lift pits and drainage or sewage sumps are the lowest points in a building, so groundwater collects there. Build them watertight, seal the kicker joint, and line them with a slurry rated for water pressure.
 Green roofs, roof gardens and planters
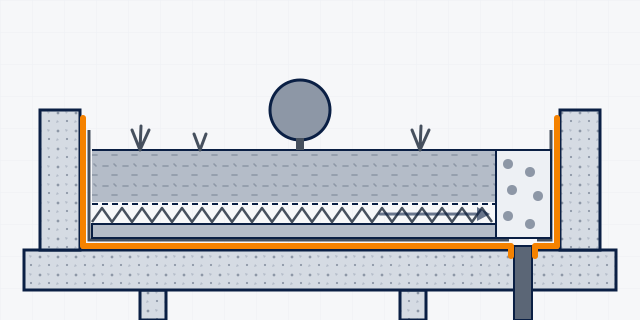
Roof gardens, landscaped decks and built-in concrete planters stay wet under soil for years, so the waterproofing must be done before any soil goes in. The data sheets we hold cover bitumen and cement-based layers; ask us about root barriers and dedicated green-roof systems.
Water tanks, pools & wet areas
Structures that hold or carry water, and the rooms that get wet every day: drinking-water tanks, pools, fountains, sewage and treatment works, canals, bathrooms, showers and kitchens.
12 solutions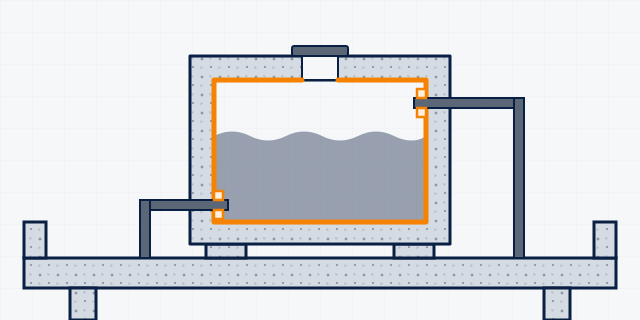 Overhead water tank (drinking water)
Rooftop RCC tanks that leak, wet the ceiling below or show rust stains. Repair the concrete first, then line the inside only with products whose data sheet allows drinking-water contact.
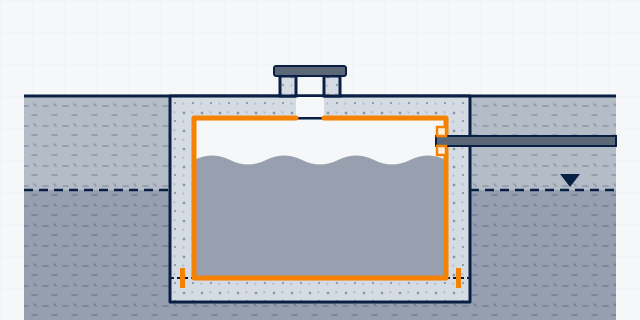 Underground water tank
Below-ground tanks leak out when full and let groundwater or dirty water seep in when empty. Plug and repair, then line the inside with a drinking-water coating; on new tanks, build watertight concrete and joints first.
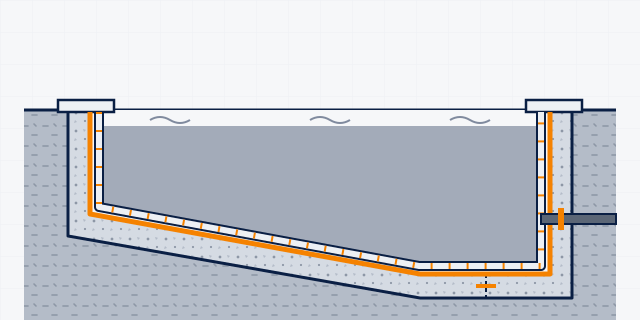 New swimming pool (concrete shell)
Build the pool shell watertight from day one: waterproof concrete, sealed joints and pipe entries, a cementitious waterproof coating, then pool-rated tile adhesive and grout. A structural engineer designs the shell itself.
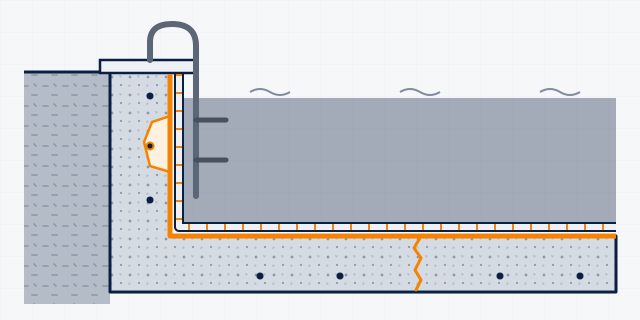 Leaking or damaged swimming pool
Older pools lose water through cracks, joints, pipe entries and failed grout, and tiles start to drum or fall off. Find the leak, repair the shell, renew the waterproofing and re-tile with pool-rated products.
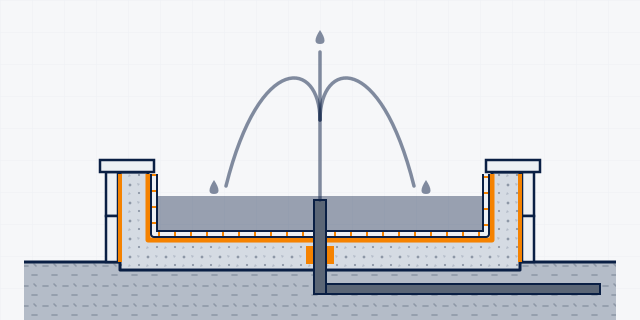 Fountains, water features & ornamental ponds
Decorative fountains, water walls and ornamental ponds lose water through cracks, joints and pipe entries, and stone cladding stains. Seal the basin with a cementitious waterproof coating, then fix tiles or stone with water-resistant products.
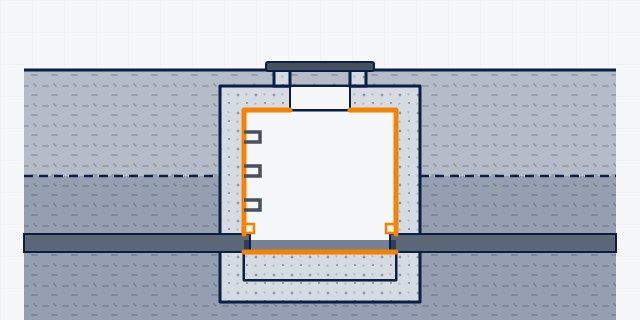 Sewage tanks, manholes & septic tanks
Sewage and wastewater structures leak out, let groundwater in and are eaten away by aggressive effluent. Plug and rebuild the concrete, waterproof it, and add a chemical-resistant lining where the effluent is aggressive.
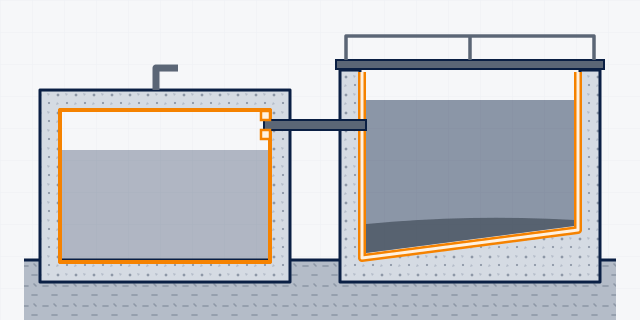 Water & wastewater treatment plants
Clarifiers, filter beds, clear-water reservoirs and process tanks need watertight concrete, sealed joints and the right lining for each water type. Drinking-water compartments take only products approved for potable contact.
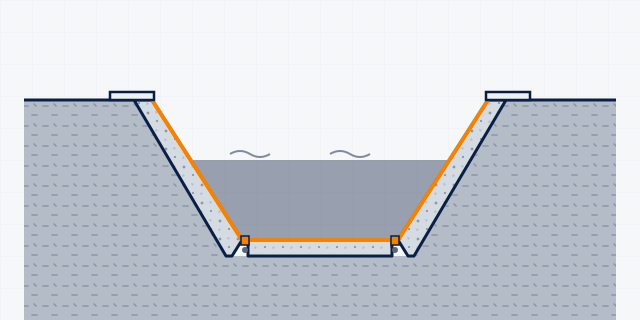 Canals, channels & open drains
Irrigation canals, water channels, nullahs and storm drains lose water through cracked lining, open joints and eroded concrete. Repair the lining, waterproof it, and seal joints with sealants made for submerged use.
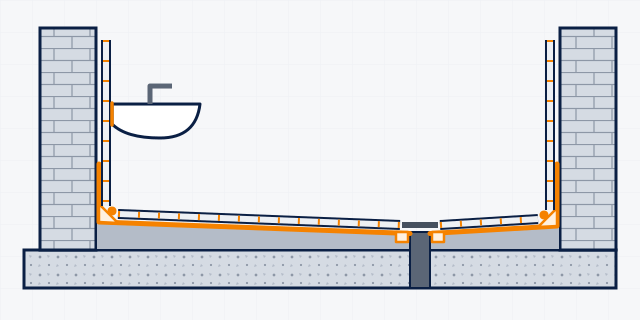 Bathroom waterproofing (under tiles)
Most home leaks start in bathrooms: water gets through grout and cracks, runs along the slab and shows as seelan on the ceiling below or the wall next door. Strip, seal cracks, waterproof the floor and lower walls, then tile, grout and seal the fittings.
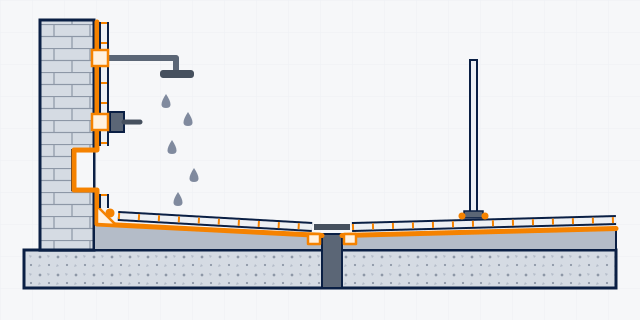 Shower area & walk-in shower
The shower is the wettest spot in the house: floor, walls, niche and drain are soaked every day. It needs a continuous waterproof layer from floor to wall, epoxy grout and a mildew-resistant sealant at every corner.
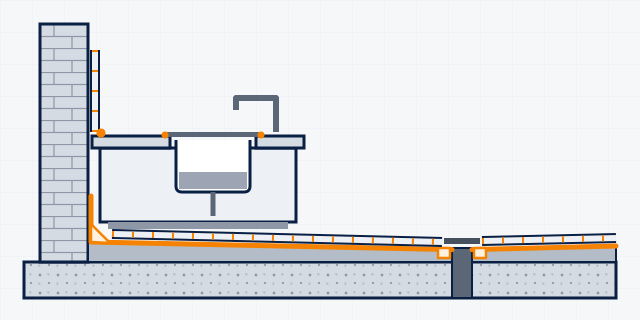 Kitchen floors, sinks & wash areas
Kitchens get water, grease, food acids and cleaning chemicals at the sink, dishwash and cooking line. Home kitchens need sound tiling and mildew-resistant sealing; commercial kitchens also need waterproofing under the tiles and chemical-resistant epoxy grout.
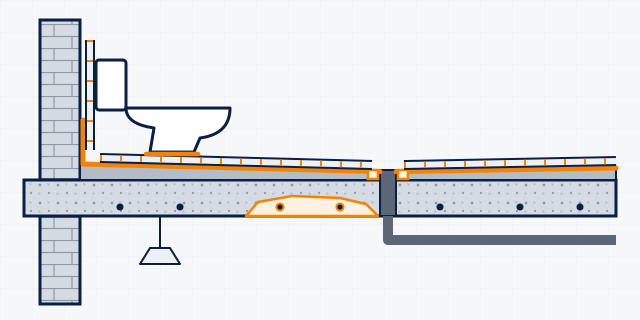 Toilet or bathroom leaking into the ceiling below
Seelan, drips or falling plaster on the ceiling under an upstairs bathroom. Find the source, fix it from the bathroom side, then dry and repair the ceiling slab below.
Tiling, grouting & joint sealing
Fix tiles and stone so they stay on, grout them for the room they are in, and seal every joint, frame, glazing line, sanitary edge, fire-rated gap and pipe entry with a product whose data sheet covers that job.
17 solutions Wall tiling (rooms, kitchens and bathrooms)
Fixing ceramic, porcelain, mosaic and marble tiles on internal walls. Choose the adhesive by the wall behind the tile (cement plaster, concrete, brick or gypsum) and by whether the wall gets wet.
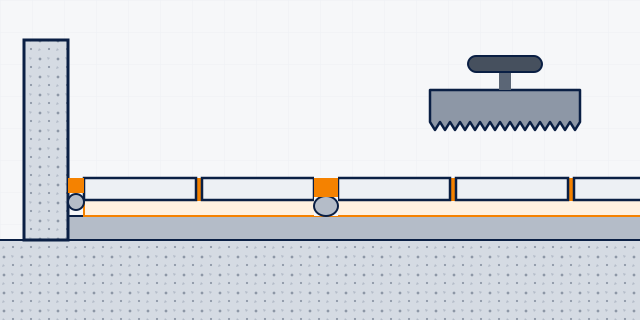 Floor tiling (homes, shops and outdoor floors)
Fixing ceramic, porcelain and stone floor tiles indoors, on courtyards and terraces, on heated floors and in shops with heavy foot traffic. A flat, mature base and the right adhesive stop hollow, cracking and lifting tiles.
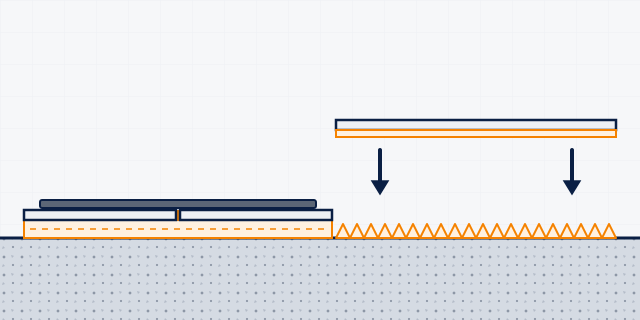 Large-format porcelain tiles and slabs
Porcelain tiles of 60 × 60 cm and larger, on floors and walls. They need a flat base, a C2TE flexible adhesive and full bedding by back-buttering, or they ring hollow and crack.
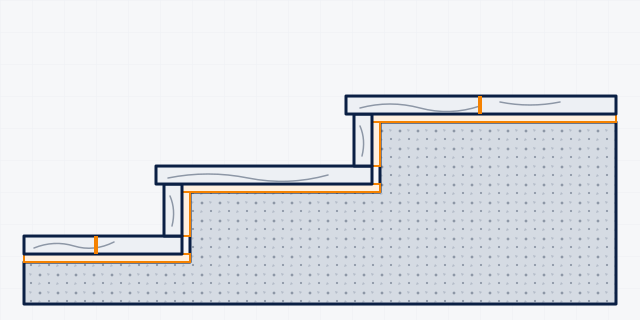 Marble, granite and natural stone
Fixing, grouting, sealing and cleaning marble, granite and other natural stone on floors, stairs and walls. Stone can be sensitive to water, acids and staining, so test first and choose each product with that in mind.
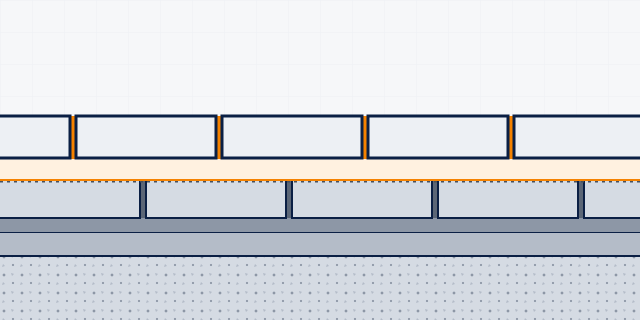 Tiling over old tiles (tile-on-tile)
Laying new tiles straight over sound old tiles, saving the noise, dust and time of breaking them out. It only works if the old tiles are firmly bonded and properly prepared.
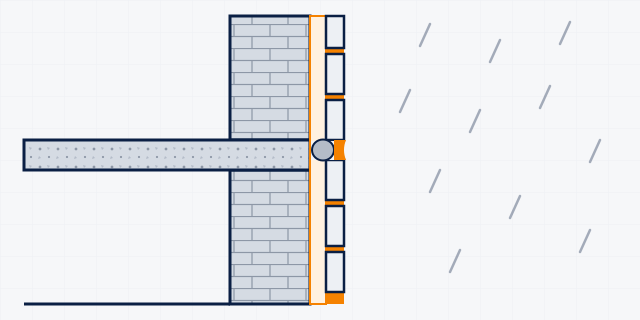 External wall and facade tiles
Ceramic, brick-slip and stone-look tiles on outside walls face sun, rain and building movement. Use an adhesive whose data sheet allows outdoor walls, grout for exterior use, and seal the facade movement joints.
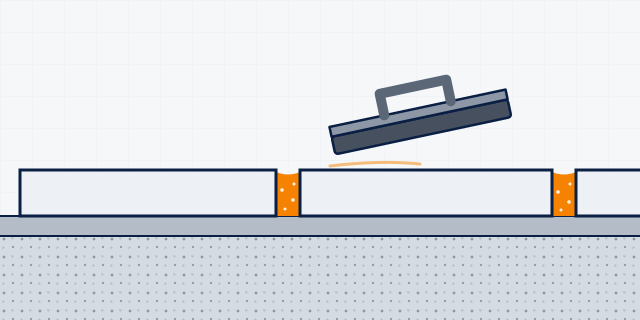 Cement tile grout (everyday floors and walls)
Coloured cement grout for ceramic, porcelain, marble, granite and mosaic joints, on floors and walls, inside and outside. In wet areas it is mixed with a latex instead of water.
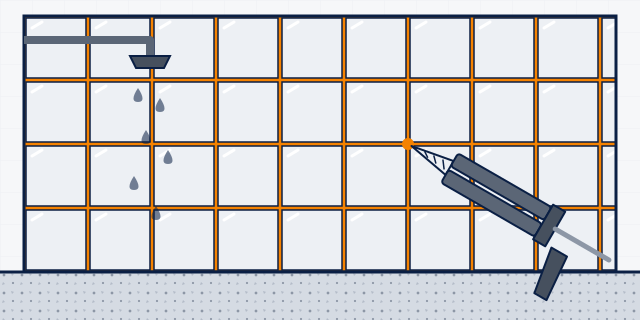 Epoxy tile grout (showers, kitchens, hospitals)
Two-part epoxy grout from a cartridge gun gives stain-resistant, easy-clean joints in wet rooms, kitchens, malls, hospitals and indoor pools. It is for interior use, and the tile face needs protecting during grouting.
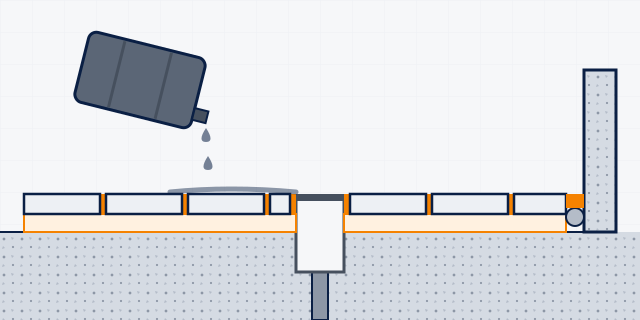 Chemical-resistant tile grout and bedding
Tiled floors and walls in food plants, dairies, labs, industrial kitchens, plant rooms and thermal or salt-water pools need epoxy bedding and grout that resist acids, cleaning agents and wash-down. These are specialist systems.
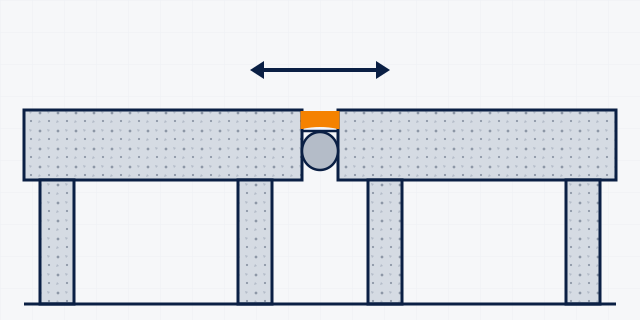 Building expansion and movement joints
The gaps between building blocks, slabs, walls and roofs that let the structure expand, shrink and settle. They need a sealant or tape matched to the movement, a correctly sized joint and a backer rod, or water gets in and edges break.
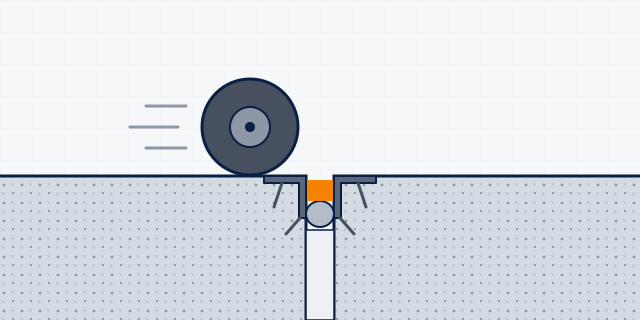 Floor joints in car parks, warehouses and roads
Saw-cut, expansion and connection joints in floors that carry people, cars, forklifts or trucks. The sealant must take both traffic and movement, and the joint must be sized for it.
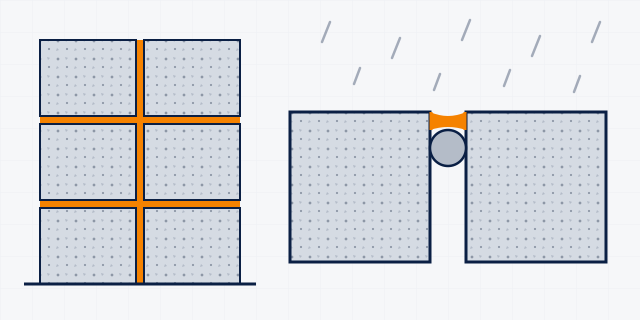 Facade joints (concrete, block, precast and cladding)
Movement and connection joints on outside walls: between precast panels, at floor slabs, around infill panels and in metal or stone cladding. A sound joint keeps monsoon rain out and lets the facade move.
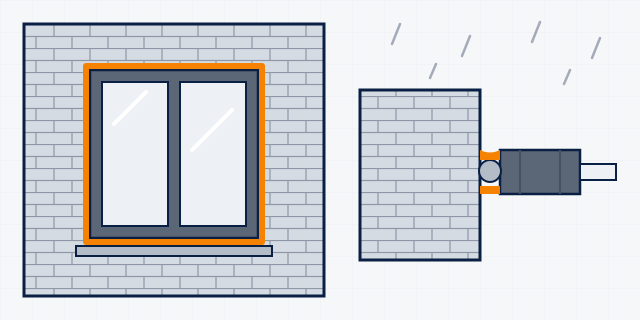 Window and door frame sealing
Sealing the gap between aluminium, uPVC, steel or timber frames and the wall, plus glass-to-frame and interior finishing joints. This is a common place for monsoon rain to get into a home.
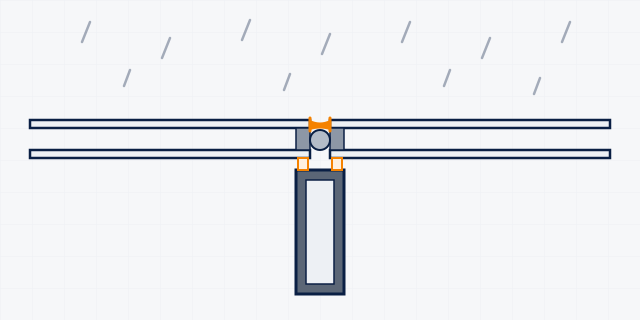 Glazing, curtain walls and shopfronts
Weather-sealing joints in glass curtain walls, windows, shopfronts and metal cladding, and the specialist silicones used in structural glazing and insulating glass. This is professional facade work and needs project-specific adhesion tests.
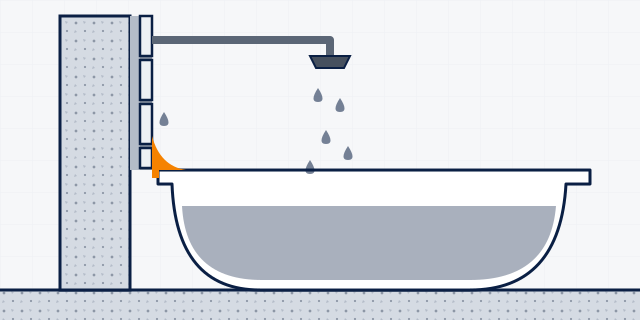 Sanitary sealing (baths, basins, showers and kitchen tops)
Silicone joints where tiles meet baths, shower trays, basins, WCs and kitchen worktops. Choose a mildew-resistant sealant that suits the surface, and reseal before water gets behind the tiles.
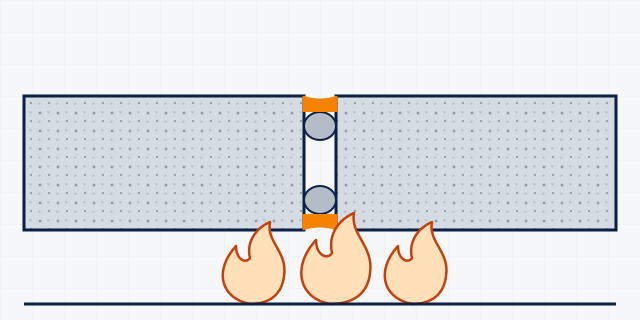 Fire-rated joints
Joints in fire-rated walls and floors, such as stair and lift shafts, compartment walls and plant rooms, must hold back fire and smoke for the rated time. The rating comes from a tested configuration, not from the sealant alone.
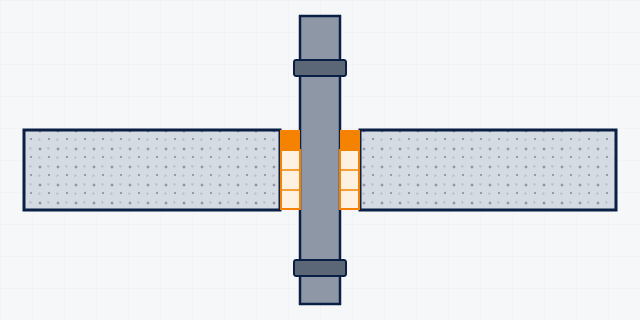 Pipe and service penetrations
Pipes, ducts and cables passing through basement walls, tank walls, roofs and fire-rated floors are weak points for water and fire. Seal each one for its job: watertight, weathertight, fire-rated, or a simple interior gap.
Concrete repair, strengthening & protection
Repair spalling and cracked concrete, stop rebar corrosion, strengthen and jacket members, and protect concrete against weather, chlorides and chemicals, following the EN 1504 repair-and-protect sequence.
11 solutions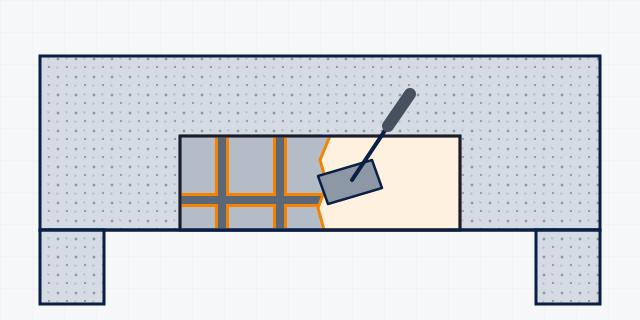 Spalling concrete (chhajja, balcony, beam, column)
Concrete that cracks, bulges and falls away, usually with rusty steel behind it, on chhajjas, balcony slabs, beams, columns and tank slabs. This guide follows the EN 1504 sequence: remove, protect the steel, rebuild, seal and protect.
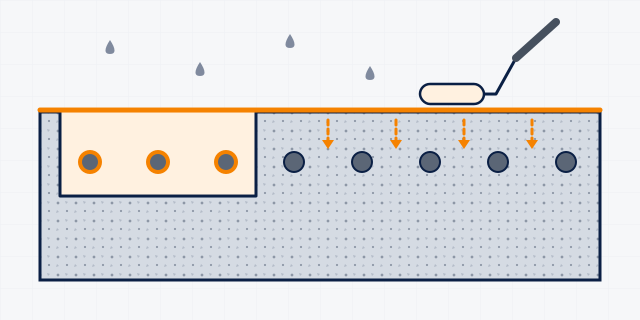 Rusting reinforcement (rebar corrosion)
Steel bars inside concrete rust when carbonation or chlorides reach them; the rust swells and cracks the cover. This guide covers finding corrosion early, treating exposed steel, and slowing corrosion in concrete that has not spalled yet.
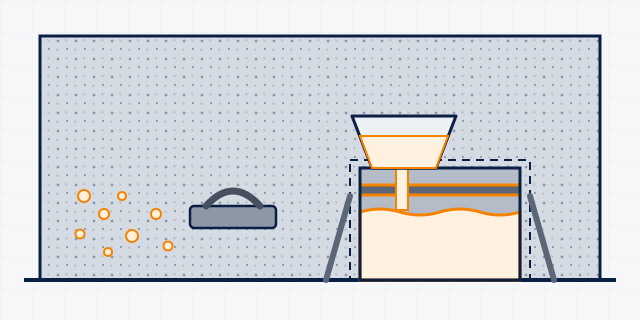 Honeycombing, blowholes & voids
Honeycombing is concrete where the cement paste did not fill the gaps between the stones, leaving pores, pockets or hidden voids, often after poor compaction or leaking shuttering. Small surface defects are filled with fine mortars; deep pockets in load-bearing members need assessment and a structural repair.
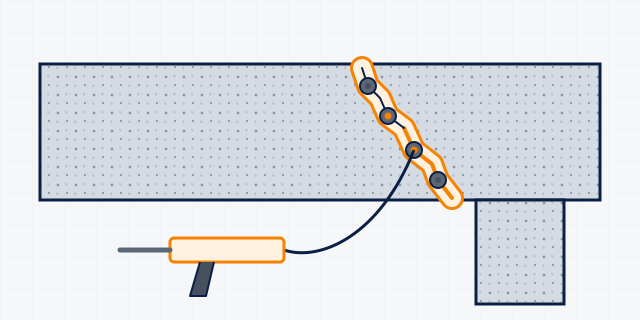 Structural cracks in beams, columns & slabs
Cracks in load-bearing members can come from overload, settlement, corrosion or design faults, so an engineer must find the cause first. Dry or damp cracks are then bonded by epoxy injection; leaking cracks follow the leaking-cracks guide.
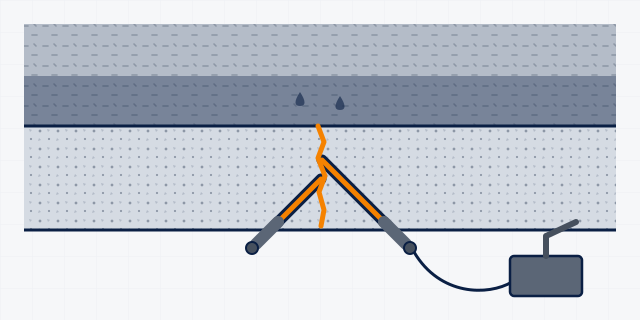 Leaking cracks & active water seepage
Cracks and holes that let water through basement walls, tanks, roof slabs or retaining walls. First stop running water, then seal the crack with elastic injection, then waterproof the surface; rigid epoxy is not used while a crack is wet.
 Surface & plaster cracks (non-structural)
Hairline and map cracks in plaster, renders and concrete surfaces, mostly from shrinkage and heat, which let rain in and spoil paint. This guide covers telling them apart from structural cracks, filling them with the right sealant, and preventing them in new plaster.
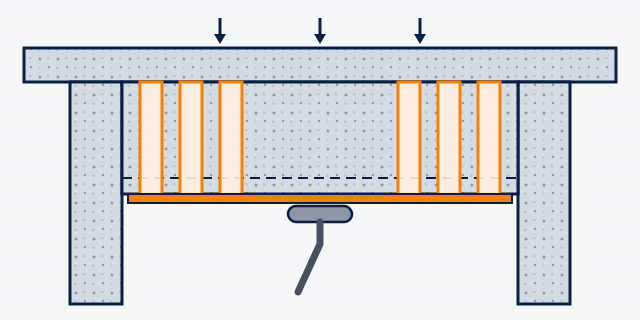 Structural strengthening (FRP wrapping)
Adding capacity to beams, columns, slabs and walls with bonded carbon or glass fibre fabrics, for change of use, design or construction defects, corrosion loss or seismic upgrading. This is engineer-designed work installed only by trained specialists.
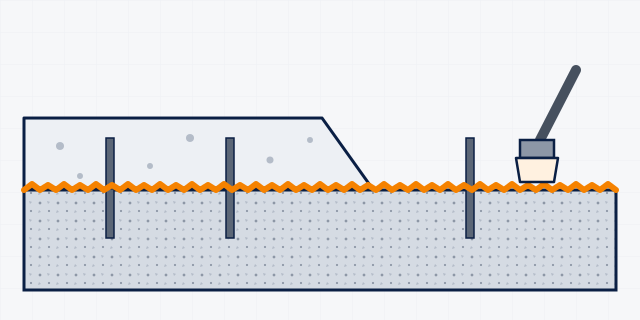 Bonding new concrete or mortar to old
Joining fresh concrete, screeds, toppings, renders or repair mortar to existing hardened concrete, for slab thickening, extensions, toppings and repairs. The joint is only as good as the surface preparation and the bond coat.
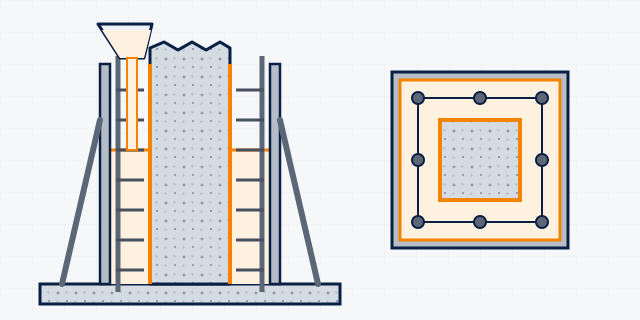 Column jacketing with micro-concrete
Enlarging and strengthening columns, piers or beams by adding steel and a flowable, non-shrink micro-concrete cast in formwork. Used for under-strength or badly damaged columns, extra floors and change of use, always to an engineer's design.
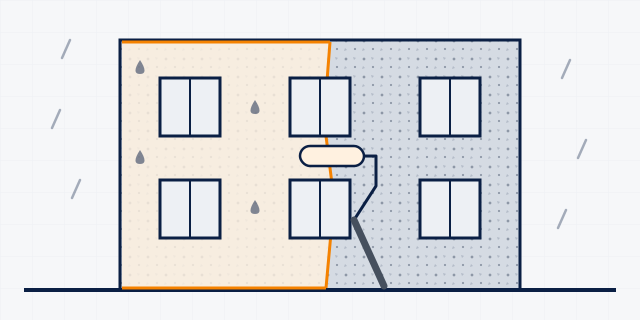 Protective coatings & water repellents for concrete
Coatings and impregnations that keep water, chlorides and carbon dioxide out of concrete facades, bridges, car parks and repaired structures. Choose a clear impregnation, an anti-carbonation coating or a crack-bridging coating to suit the exposure.
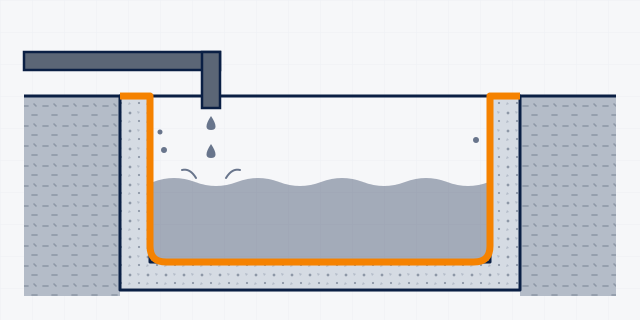 Chemical-resistant protection (tanks, bunds, sewage)
Linings and coatings that protect concrete and steel from acids, sewage gases, fuels and industrial chemicals in treatment plants, chemical tanks, bunds and manholes. The coating is chosen for the actual chemicals, concentrations and temperatures, on a strong, prepared substrate.
Concrete, floors, grouting & anchoring
Admixtures for ready-mix and site concrete, industrial and decorative floors, and the grouts and anchors that carry loads into concrete.
20 solutions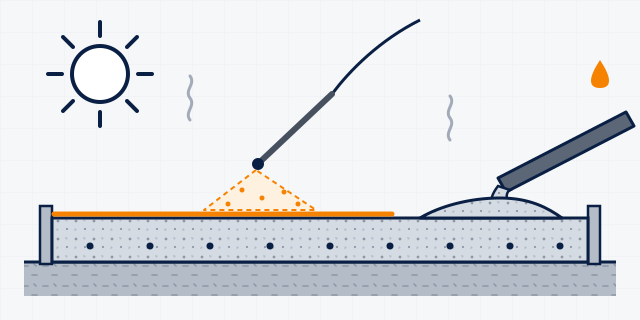 Hot-weather concreting
In a Pakistani summer, concrete loses slump in the truck, sets before it is finished and cracks if it dries early. Use a hot-climate superplasticiser or retarder, pour in the cooler hours and start curing straight away.
 Cold-weather concreting
In winter in Murree, Quetta and the northern areas, fresh concrete can freeze or gain strength too slowly to strip the forms. An antifreeze accelerator, warm materials and insulation keep the work moving.
 High-performance ready-mix concrete
Ready-mix plants supplying high-strength, pumped or long-haul concrete need a superplasticiser that holds slump, cuts water and works with GGBS, fly ash or microsilica. Durability admixtures cover corrosion and air entrainment where the specification asks for them.
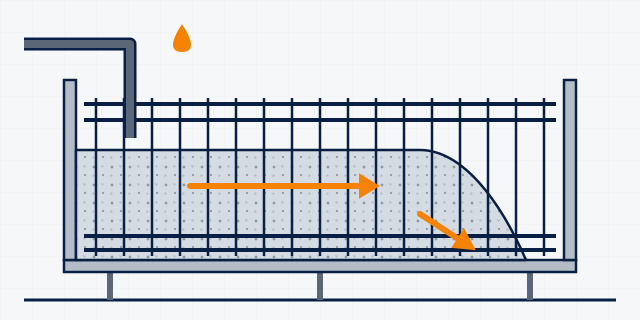 Self-compacting concrete (SCC)
Self-compacting concrete flows into congested reinforcement and fills forms without vibration. It needs a high-range polycarboxylate superplasticiser, an SCC mix design and strong, well-sealed formwork.
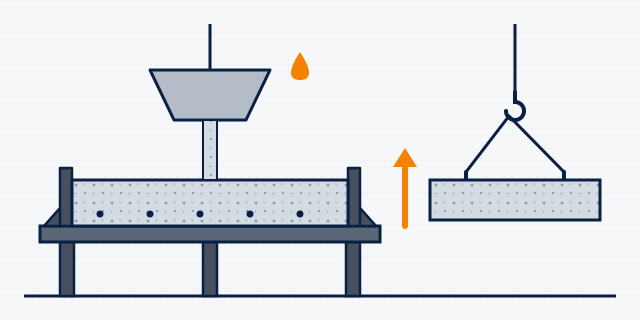 Precast concrete production
Precast yards need early strength for quick stripping and mould turnover, or semi-dry mixes that fill moulds evenly for pavers, blocks and kerbs. Choose the admixture by process: wet-cast or semi-dry.
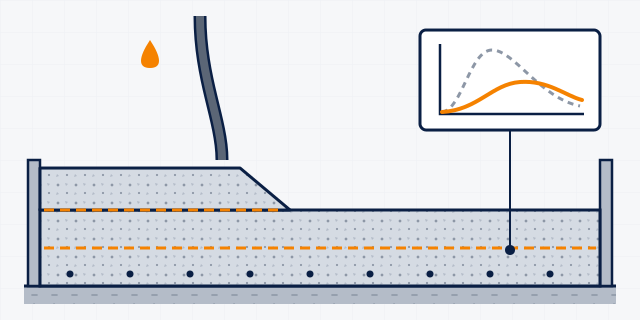 Mass concrete & set retarding
Thick rafts, dams, bridge piers and large foundations heat up as the cement hydrates and can crack, and big pours risk cold joints. A retarding superplasticiser or set retarder spreads the heat release and keeps each layer workable until the next one arrives.
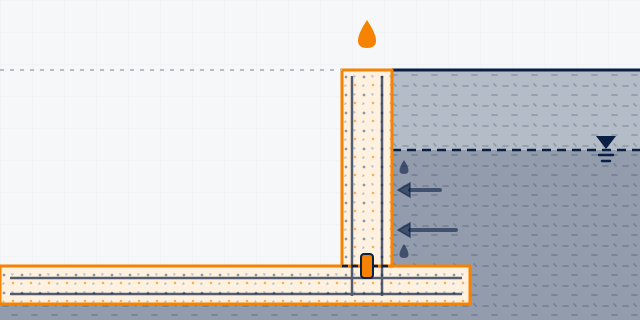 Waterproof (watertight) concrete
For basements, water tanks, pools and sewage works, make the concrete itself resist water with a low water–cement ratio, an integral waterproofing admixture and sealed construction joints. This is for new pours; it cannot fix a structure that already leaks.
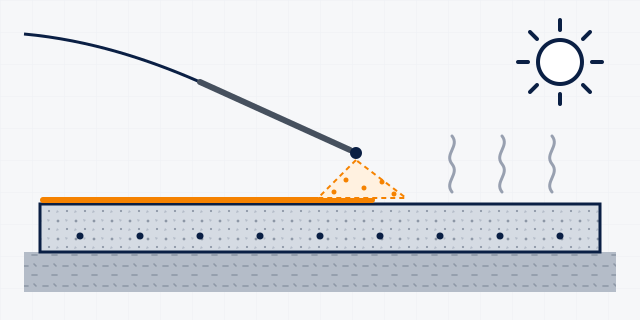 Concrete curing
Curing keeps water in young concrete so it gains strength and does not crack or dust. In Pakistan's heat and dry wind it must start within minutes of finishing, by wet curing or a sprayed curing compound.
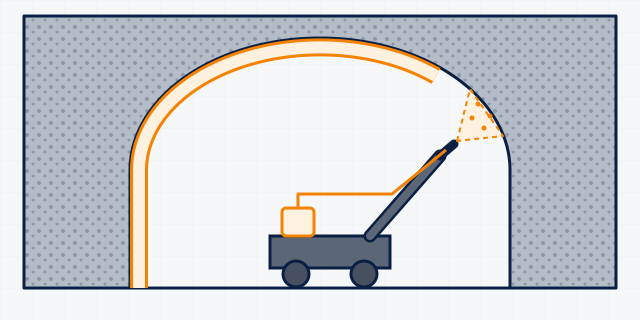 Shotcrete, tunnels & slope stabilisation
Sprayed concrete supports tunnel faces, galleries and cut slopes and lines channels and pools. The system is a pumpable base mix with a superplasticiser, an accelerator dosed at the nozzle, and often fibres.
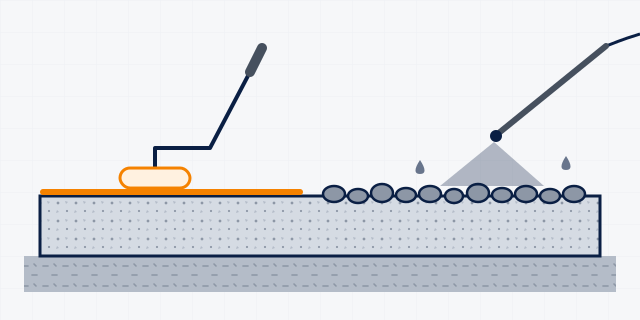 Exposed aggregate finish
Exposed (washed) aggregate gives slip-resistant, decorative paving, walls and panels, and a rough key at construction joints. A surface retarder stops the top layer from setting so it can be washed off to reveal the stone.
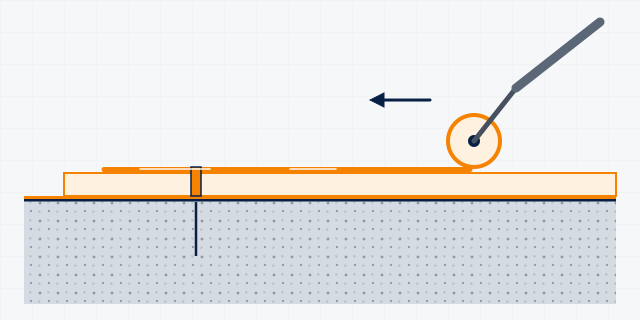 Epoxy industrial floors
Epoxy floors give factories, warehouses, workshops and labs a seamless, dust-free and easy-to-clean surface. Success depends on a strong, dry slab, mechanical preparation and a trained applicator.
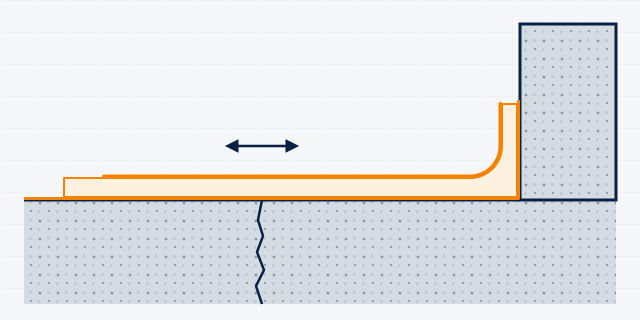 Polyurethane & elastic floors
Polyurethane floors are tougher and more flexible than epoxy, can bridge fine cracks and, with the right seal coat, resist UV. Use them on crack-prone slabs, for comfortable decorative interiors, on balconies, and as PU-cement screeds where heavy wear and heat occur.
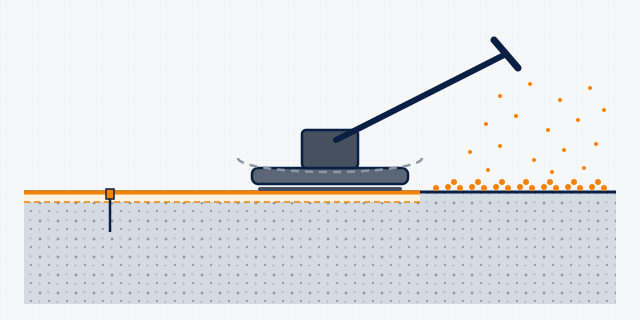 Warehouse floor hardeners (dry-shake)
New warehouse and factory slabs get a hard, dust-free wearing surface when a dry-shake hardener is trowelled into the fresh concrete and cured straight away. Existing dusty slabs can be densified with a liquid hardener.
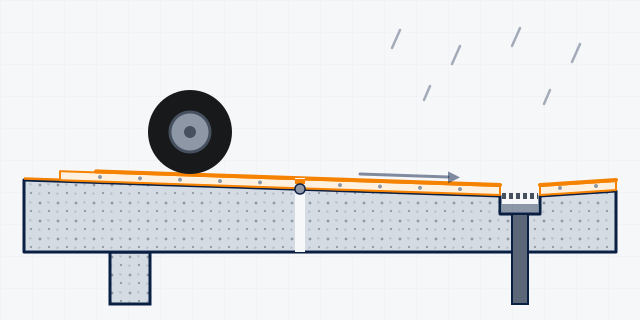 Car-park decks & ramps
Car-park decks face tyre wear, oil, water and, on the open top deck, sun and monsoon rain. A crack-bridging resin system with a UV-resistant seal coat and sealed joints protects the slab and the floors below.
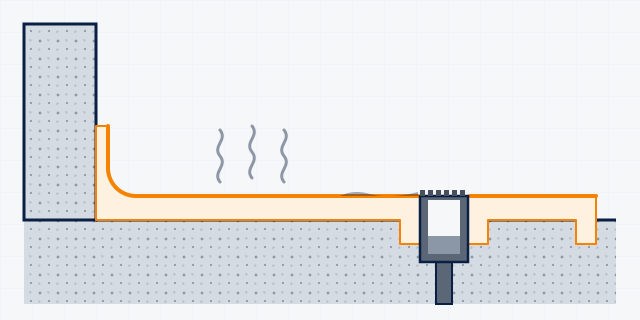 Food, beverage & chemical floors
Dairies, bakeries, beverage plants, pharma and chemical areas need floors that resist hot water, steam cleaning, thermal shock and chemicals without tainting food. Polyurethane-cement screeds (PurCem, Ucrete) with coved upstands are the usual answer.
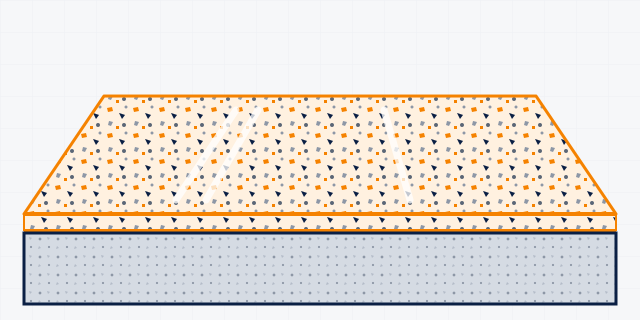 Decorative floors
Showrooms, offices, malls, lobbies and homes want floors that look good and still wear well. Options range from coloured epoxy with décor granules and soft polyurethane to terrazzo-look PU, coloured dry-shake and polished concrete.
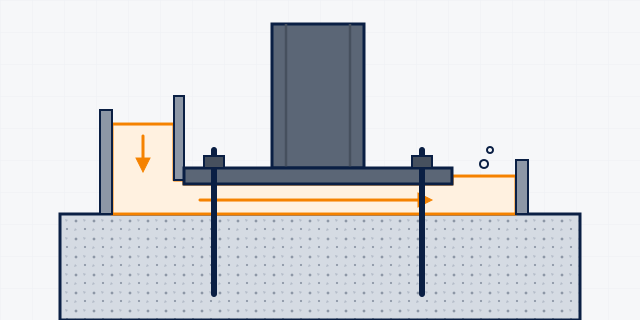 Base plate & bearing grouting
Steel columns, bridge bearings and equipment sit on a layer of non-shrink grout that carries the load into the foundation. Choose the grout by gap depth, mix it with only the specified water, and pour it continuously from one side.
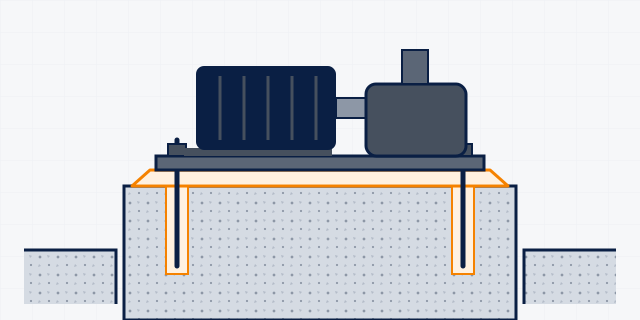 Machine foundations & equipment bedding
Generators, compressors, presses, pumps and turbines need a foundation that carries vibration and impact without loosening. The usual build-up is engineered concrete, anchored or grouted holding-down bolts, and a high-strength non-shrink bedding grout.
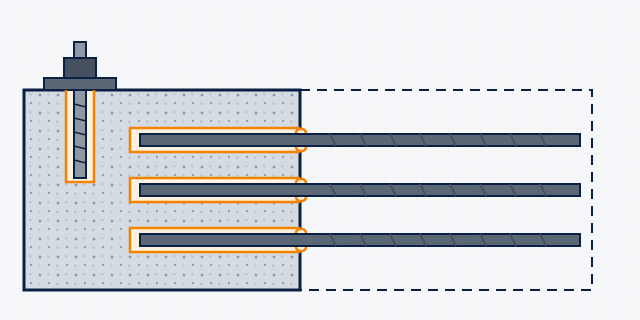 Chemical anchors, rebar & dowels
Chemical anchors fix bolts, threaded rods and new reinforcement bars into existing concrete or masonry for extensions, railings, machines and services. Load capacity depends on the design, hole cleaning and base material, so safety-critical work needs an engineer.
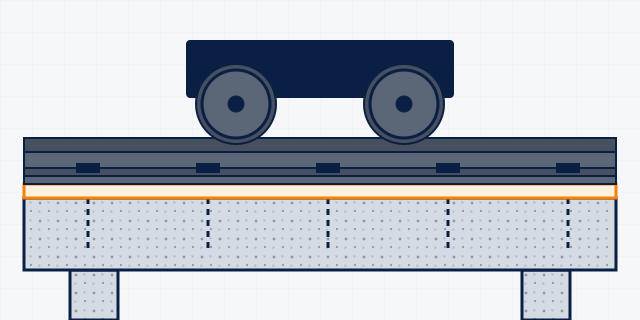 Crane rail & runway grouting
Overhead and gantry crane rails in workshops, steel mills and ports sit on grouted sole plates fixed with holding-down bolts. A high-strength, non-shrink grout with good fatigue and impact resistance keeps the rail level under repeated wheel loads.
Pictures: MCT technical illustrations (schematic, not to scale). Solutions are drafts pending technical sign-off.